Table of Contents
1、注册/登录PostPony的账号,点击这里
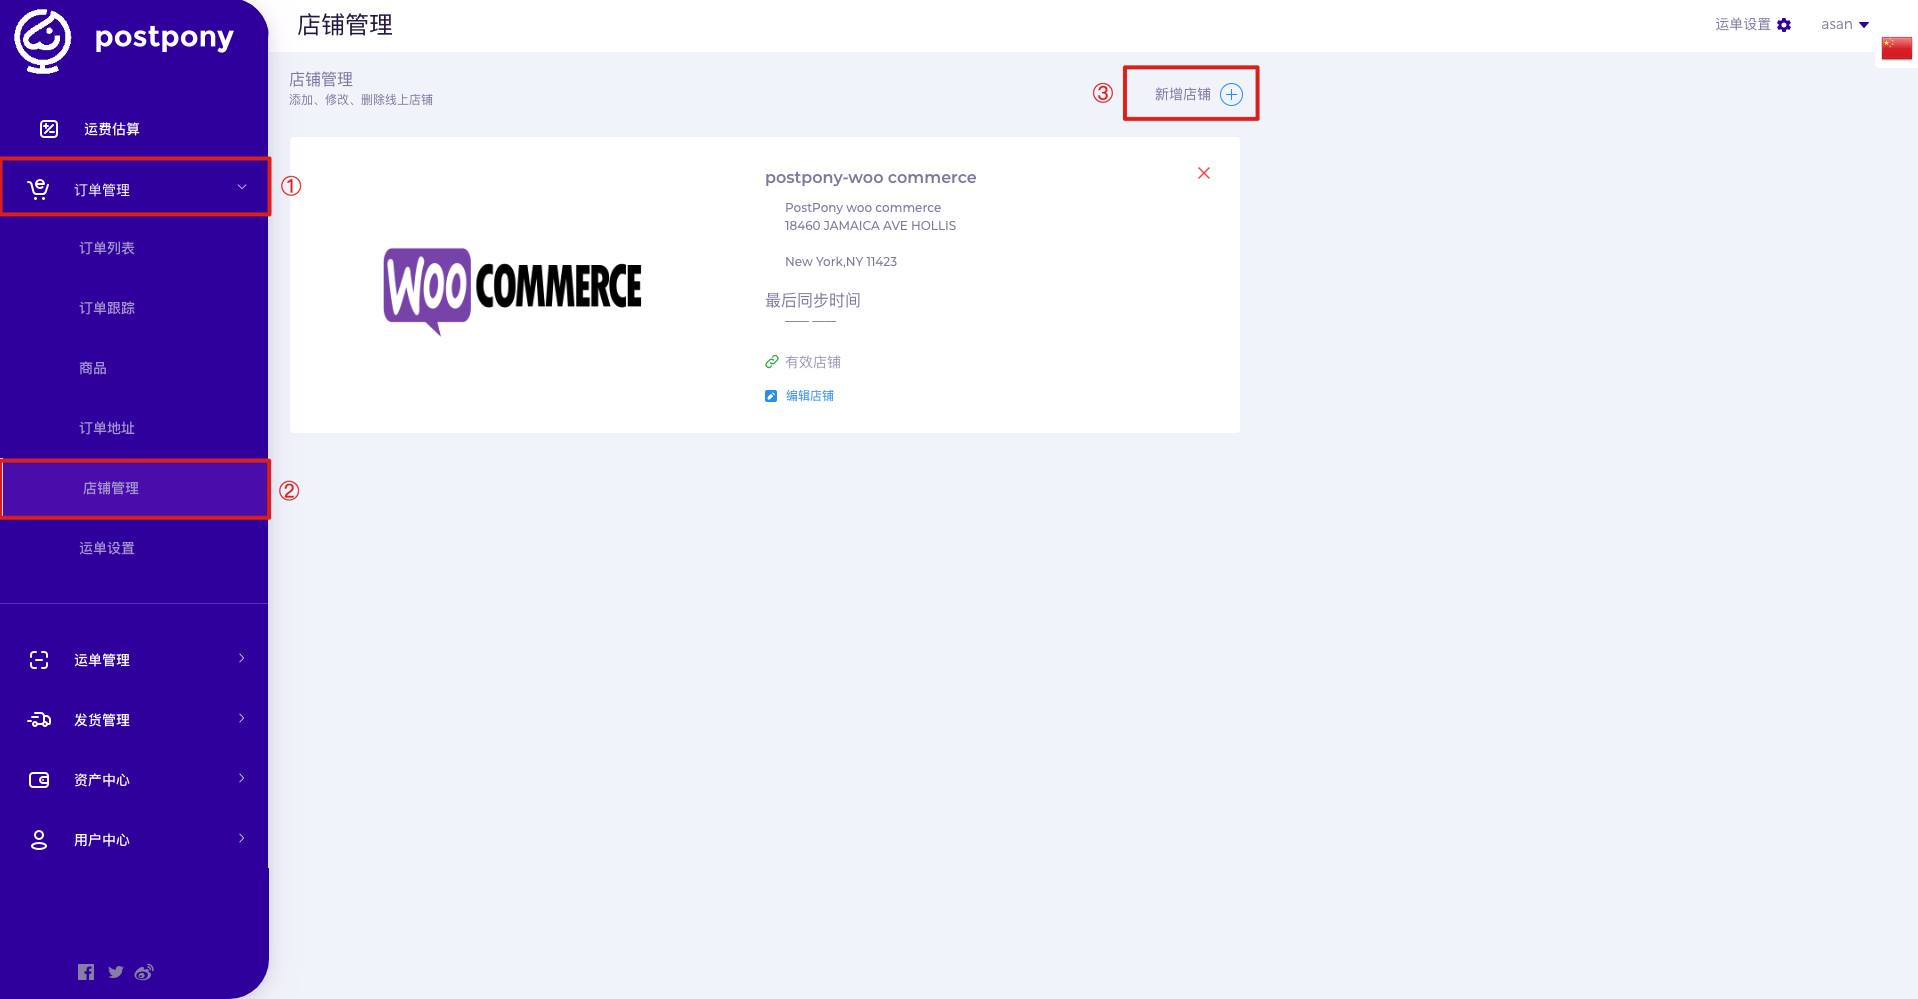
2、依次点击左侧菜单“电子商务”→“店铺管理”,点击“新增店铺”按钮。如下图所示。
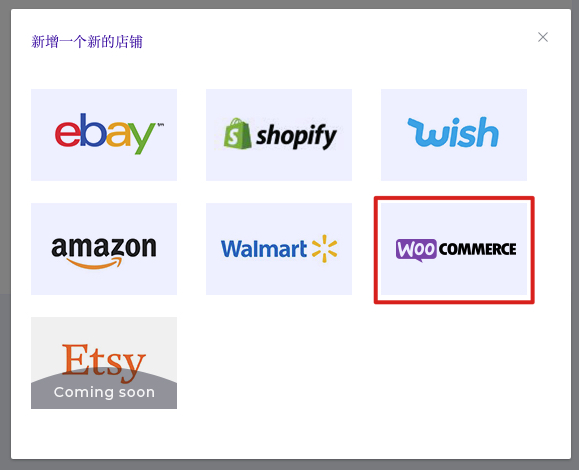
3、再弹出窗口中,选择”Woo Commerce”
4、在新的弹窗中填写所需内容并完成授权。
店铺别名:可自定义填写的店铺名称
Shop Url:Woo Commerce店铺的链接地址
Ship From Address:选择店铺的默认发货地址
consumer Key:API Key,请查看“如何开启Woo Commerce店铺Rest API”
consumer Secret:API Secret,请查看“如何开启Woo Commerce店铺Rest API”

如何开启Woo Commerce店铺Rest API #
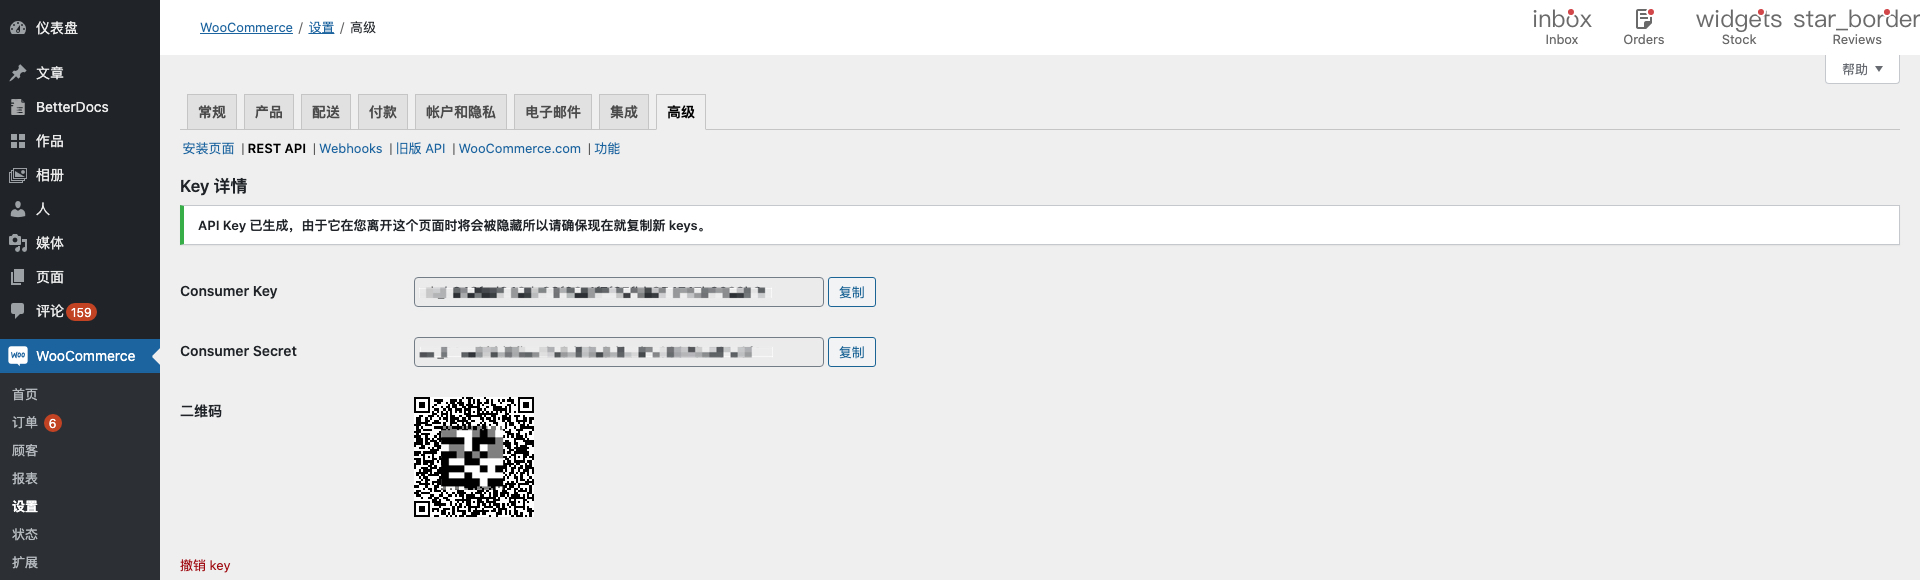
1、登录Woo Commerce店铺后台,并进入REST API页面
- 点击Woo Commerce菜单
- 选择“设置”页面
- 在“设置”页面中选择“高级”标签
- 在“高级”标签页中选择“REST API”
- 点击“添加Key”开始添加新的REST API Key
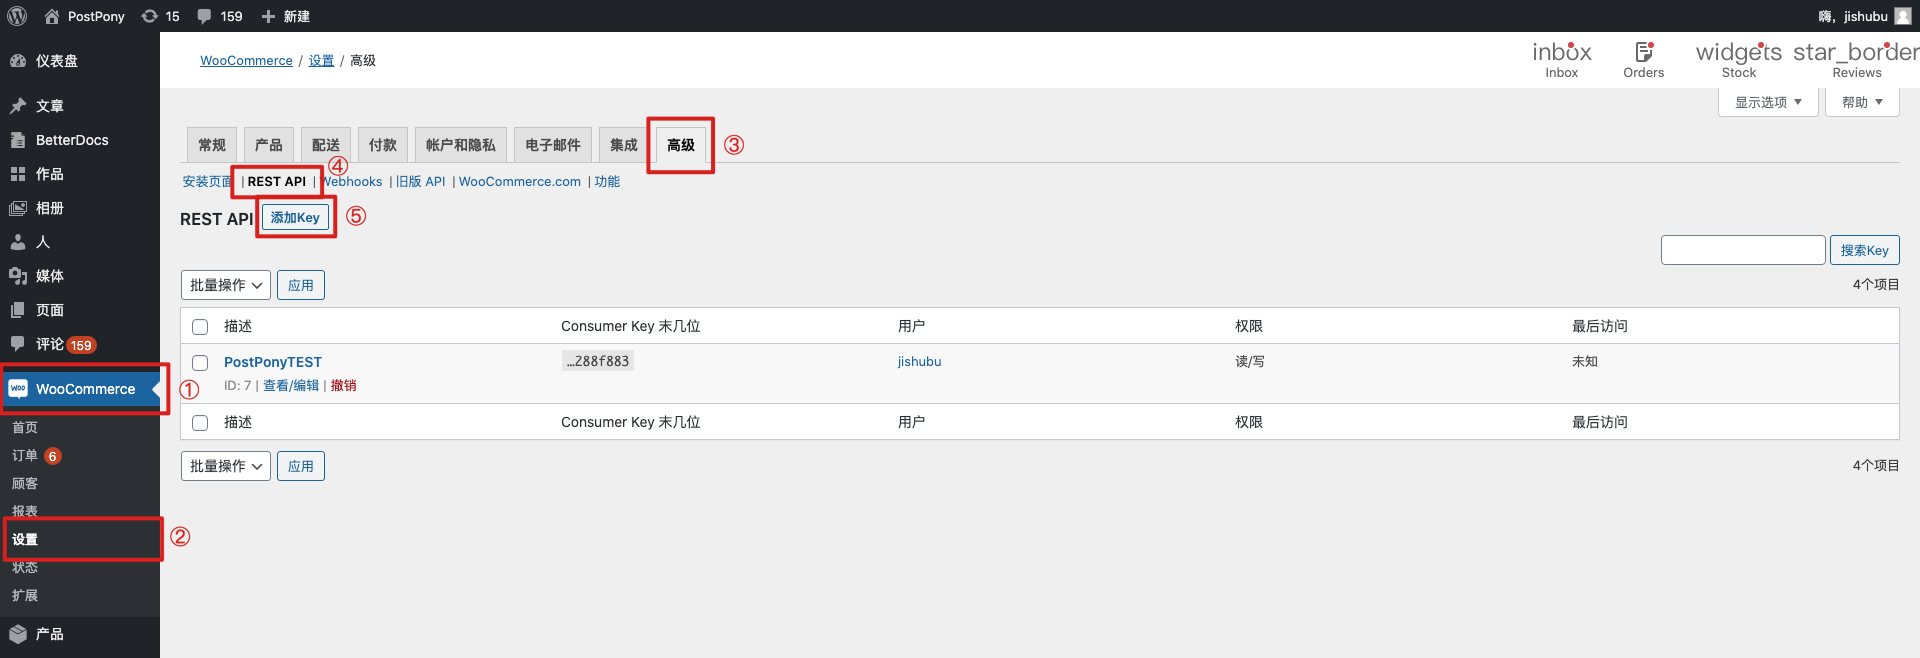
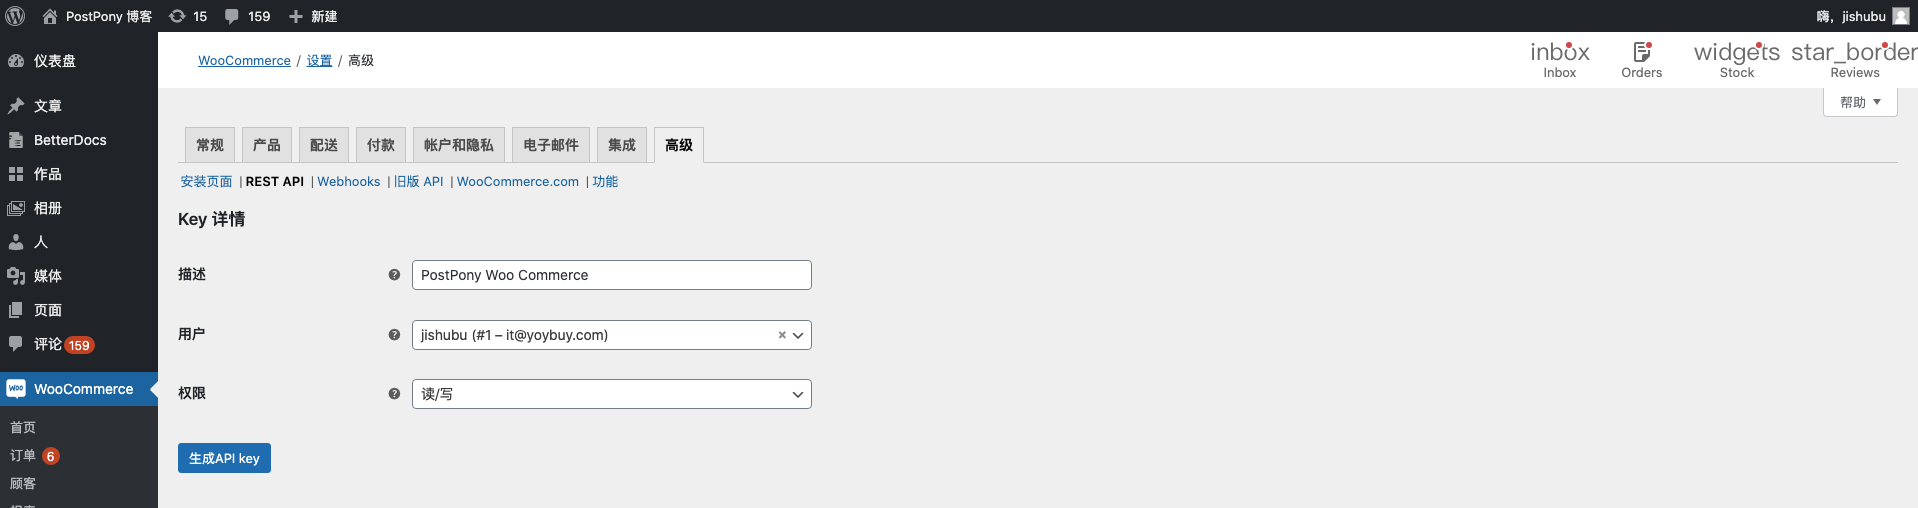
2、在添加Key页面中,填写并选择信息后,点击“生成API Key”
描述:自定义填写的描述名称,可填写“PostPony”
用户:该用户将被用作API的订单处理者
权限:请选择“读/写”,否则可能会影响订单信息的正常同步
3、创建成功后,会显示Consumer Key和Consumer Secret